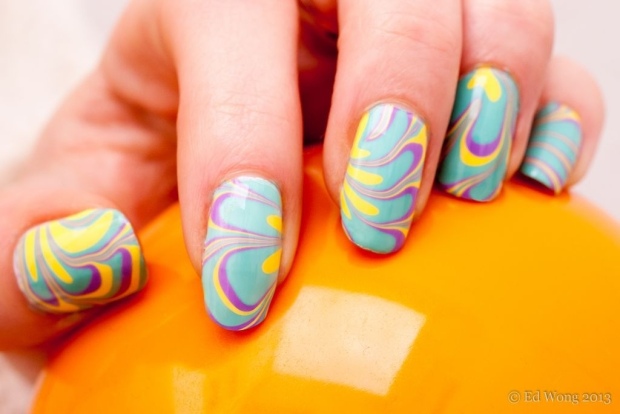
water marbling

Water Marble Disaster

I hadn’t done any water marbling in a while and thought it would be fun and relaxing to spend an afternoon doing one of my favourite kinds of nail art techniques. Wrong! I spent ages trying to find polishes that would work and that were a combination of colours I actually liked. I’ve never had so much trouble with finding polishes that work well with marbling before, so I’m wondering if it had to do with the air and therefore also water temperature being much higher than when I did this over the winter.

Once I found colours I liked together that worked it still didn’t seem to go well and I had all kinds of mini disasters from air bubbles to smudged nails and not cleaning up the water surface well enough.

They didn’t look a total mess but when I finished I was feeling a bit frustrated and disappointed with my manicure so I decided to stick some gems on to brighten them up. I’m not sure it really worked and I think they just looked a bit too busy and over the top!

I’m not going to give up on water marbling as I’ve had some great successes in the past. Let’s hope next time it’s more fun and less frustrating though!

20130612-000834.jpg

I used: For Audrey – China Glaze, The Last Trial – Anny.

April 30 Day Challenge Day 15: Water Marble

I was happy to have another go at water marbling after my first successful attempts last month. I encountered my first difficulty with the technique when one of the polishes I initially chose just didn’t want to spread out in the water. After a few tries, I abandoned it for another polish which worked fine.

The last time I tried water marbling the patterns I did we’re completely random and I loved that, but this time I wanted to see if I could get a more regular look across my nails and try to have a similar pattern on all of them.

20130419-003124.jpg

I used: Mellow Yellow – Sally Hansen, Jungle Queen – China Glaze.

My first attempts at water marbling

The very first nail art tutorial video i ever watched was a water marbling one. I had several reactions to it – “I will never be able to do that”; “it looks amazing!” and “it looks kind of time consuming and messy…”

So I never tried it. I put it off, thinking it was difficult, messy, time consuming, out of my league. Finally I decided that on a rainy Friday afternoon when I had nothing better to do would be the perfect time to give it a try.

I watched a ton of tutorial videos! My favourites were cutepolish’s video (she must be one of my most referenced video tutorial makers!) and simplelittlepleasures’ video. nail art 101 also does a great photo tutorial.

So here are the results from my first try!

20130312-202718.jpg

I was so thrilled! I had one nail which came out a bit bubbly and another that looked a bit dull (maybe I hadn’t cleaned all the excess polish off the water surface when I took my finger out of the water) but otherwise they looked great!

I was so excited that I wanted to have another try a couple of days later – so my Sunday afternoon was spent water marbling too!

20130312-202953.jpg

So it turned out I was mainly wrong with my initial reactions to water marbling – I can do them, they’re no messier than sponging if you tape them well and not that time consuming – I’ve spent far longer on other designs! I was right about one thing: They look amazing!!!

I used: Mellow Yellow – Sally Hansen, Do you Lilac It? – OPI, For Audrey – China Glaze (first pic)
Baker Street – Nails Inc, Papaya Punch – China Glaze, The Last Trial – Anny (second pic)